In the post I'm going to go through the steps on how-to configure a FortiAuthenticator (FAUTH) from scratch so that it can serve as a RADIUS server for admin logins on a FortiGate (FGT), as the Single Sign On (SSO) service for a FortiGate and lastly as a Certificate Authority that will create a cert for a FortiGates admin GUI and to be used in the SSL proxy for deep packet inspection.
It's quite a long one so grab a coffee and get ready!
The post is split into a few key areas:


Confirm all the users that show up are the ones we want to import. Click 'User Filter' then OK to save.


Here we can see both our user groups have been created. Each will have the Fortinet-Group-Name and Fortinet-Access-Profile configured:


If all was configured correctly (on the FAUTH and FGT) then you should see a successful status:


3. Monitor > SSO > Domain Controllers


5. We should now see this certificate with the status of 'Pending'. Select the certificate and click on 'Download'.


7. Now we should see the certificate has been signed by the FAUTH and it's status is Active. We now select the certificate and export it to our drive.

8. Log back into the FGT and select Import > Local Certificate.

9. Select the certificate we downloaded in step 7 and click OK

We should now see the certificates status changed from 'Pending' to 'Ok'

Ok so lets recap what we just done now... we create a certificate request from the FGT. We then downloaded that certificate and imported it into the FAUTH. The FAUTH signed it with it's own certificate. We downloaded this signed certificate and imported it back into the FGT.
10. Now lets use this certificate for our admin GUI page. Goto System > Admin > Settings and select the certificate we created/signed previously. Click Apply to save.

11. Close your browser and reopen. Goto your FGT admin page and we should now see that the certificate has been signed and verified by the FAUTH. Because we imported this root certificate (in step 3) we shouldn't get an error anymore.

Last thing we want to do now is create a certificate that can be used by the FGT to sign web pages on behalf of their owners. This allows the FGT to break into SSL and perform a man in the middle 'attack' which will allow us to perform security functions like application control and AV within SSL traffic.
12. Create a certificate signing request just like we did in step 4:

13. Download the certificate and upload it into the FAUTH to be signed again. The only difference here is that we import the certificate as a CA. Goto Certificate Managment > Certificate Authorities > Local CAs and click on 'Import'
Select 'CSR to sign' and browse the certificate we created in step 12 (not the one from step 4). Click OK to save.

14. We can now see now see the certificate with the CA type of 'Intermediate (non-signing) CA'. Select the certificate and download it.

15. Import the downloaded certificate back into the FGT like we did in step 8 (ensuring we use the certificate downloaded in step 14).
We should now see the certificate with the status of 'OK'

16. Edit the certificate to confirm that CA=true

17. Now that we have our proxy certificate, lets select it in our deep inspection profile. Goto Policy & Objects > Policy > SSL/SSH Inspection, select the 'deep-inspection' profile (top right) or alternatively create your own one.
From here select the proxy certificate we imported under 'CA Certificate':

18. Next edit our internet policy and enable SSL/SSH Inspection and select the profile we edited/created in step 17.

19. Time to test it out! From our computer lets browse https://www.youtube.com. We can now see that it's been signed by the FGT and is not giving us an error.

20. View a youtube video then goto System > FortiView > Cloud Applications. From here we should now be able to see the video names the user is browsing. Note: to get this to work ensure the policy has application control enabled with cloud based inspection.

Phew, that's it from me for now. Hope you found this useful!
It's quite a long one so grab a coffee and get ready!
The post is split into a few key areas:
- Initial setup of the FAUTH
- Configuring RADIUS groups to be used by the FGT
- Configuring FSSO to be used by the FGT
- Creating a root certificate to be used by the FGT
1. Initial setup of the FAUTH
1. Once we've booted up the FAUTH for the first time we need to setup the IP address and default gateway. Connect to the FAUTH via console or SSH (192.168.1.99) and use the following commands (substituting your own values):
set port1-ip<port 1 IP address and subnet mask>
set default-gw <default gateway IP address>
It should look something like this:

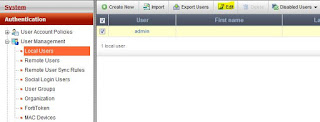
2. Next up we should change the admin password. Goto Authentication >
User Management > Local Users and edit the admin user, then change
the password and save.

3. Now change the host name, FQDN and system time:

4. Next configure the DNS to point to your internal server. This is found under System > Network > DNS.

5. If you have a FAUTH VM then you'll need to upload the license. Goto System > Administration > Licensing and upload your license. Click OK and wait for the system to reboot.

Lastly let's create our Organisation. Goto Authentication > User Management > Organization and enter your company name and upload a logo (if applicable):

2. Configuring RADIUS groups to be used by the FGT
Now that the initial setup has been finished we can configure the FAUTH to import users and create groups that will be used for the FGT administrators.
1. First up create a LDAP profile on the FAUTH by going to Authentication > Remote Auth Servers > LDAP. From here enter the IP address, Base DN, select regular bind type and enter a user account that has read access to the LDAP directory.
Once this is done click on the folder icon highlighted below to confirm we're able to browse the LDAP server and view the OU's correctly.

Here we can see our groups and user OU's. Click 'User filter' and then Ok to save.

3. Next we need to import the users from LDAP to the local database. Goto Authentication > User Managment > Remote User Sync Rules and create a new rule. From here select the LDAP server and enter our base DN and the frequency that the users will synchronize. Once again click on 'Test Filter' to confirm we've entered the details correctly and the intended users show up.


4. Back in step 3 we selected the users to sync every 1 hour. Instead of waiting an hour for this to happen we can manually sync the users from LDAP to the local database. Select sync profile we created in step 3 and click on 'Manually Sync'

Now confirm the users have sync'd correctly by going to Authentication > User Management > Remote Users

5. Now we need to create the user groups that the FGT will be using to determine the admin access level. In this example we'll create two groups, 'Full Admin' and 'Read Only'.
Goto Authentication > User Management > User Groups and create a new group. Enter the name, select our ldap server and enter an LDAP filter. Use the filter below and substitute your own CN,OU and DCs as required.
(&(objectCategory=user)(memberOf=CN=Full Admin,OU=Groups,OU=Lab,DC=ingramlabs,DC=com,DC=au))
As always, click on 'Test Filter' to confirm the users that show up are the ones that exist in this group.

Here we can see the two users that are members of 'Full Admin' in AD are showing up correctly. Click 'User Filter' when happy with the result.

6. Before we click on OK to save the user group we need to add the RADIUS attributes that will be sent to the FGT when it requests the user authentication. Click on 'Add Attribute' within the user group:

7. Select Fortinet as the Vendor and Fortinet-Group-Name as the Attribute ID. Enter the name of the group for the Value:

One thing to note here is that the Fortinet-Group-Name attribtue is required by the FGT. If you're also configuring the FAUTH to handle admin RADIUS requests for your FortiAnalyzer and FortiManager then you'll need to add the Fortinet-Access-Profile attribute like we did previously. Ultimately your group should look something like this:


8. Now lets create our realm. Goto Authentication > RADIUS Service > Realms and create a new realm. Enter a name and select our LDAP server.

9. By default the FAUTH will block all RADIUS requests that are sent to it unless they have been defined as a RADIUS client. So lets add the FGT as a RADIUS client to service the admin requests.
Goto Authentication > RADIUS Service > Clients and add a new client.
From here enter a name, the IP address of the FGT then a secret/password. Next select the realm we created in step 8, enable Windows AD domain authentication, select the group filter and add the two groups we created previously. Make sure YOU CLICK ON SAVE before you click OK or it won't save your default profile.

10. Ok that's all the configuration we need to do on the FAUTH for now! Lets login to the FGT and create the RADIUS server. Goto User & Device > Authentication > RADIUS Servers and create a new server.
Enter a name, the IP address of the FAUTH and the secret/password we entered in step 9. Click Test Connectivity to make sure it's working correctly:

Enter a username/password for a user that belongs in either of the two groups we created and click Test:

If all was configured correctly (on the FAUTH and FGT) then you should see a successful status:

Click OK and save the RADIUS server.
11. Next let's replicate the groups we created in the FAUTH into the FGT.
Goto User & Device > User > User Groups and create a new group.
Enter the name, select Firewall as the type and select the RADIUS server created in step 10. For the Group Name enter the Fortinet-Group-Name attribute that we configured in step 7 (Full Admin in this example).

Here we can see both the groups in the FGT that match the ones we created in the FAUTH:

12. Now lets create an admin profile for the Read Only group. For the Full Admin group I'll be using the super_admin profile.
Goto System > Admin > Admin Profiles and create a new profile.
Give it a name and select Read Only for all access control options.

13. We can now create the admin users. Goto System > Admin > Administrators and create a new admin.
Enter a descriptive name (doesn't have to be the username) and select 'Full Admin' as the user group. Select 'super_admin' as the Administrator Profile. Lastly ensure that 'Wlidcard' is selected.

Do the same for the read only user except selecting Read Only user group and read_only profile.

14. Now it's time to test the logins. Logout and back into the FGT with a user that's in the Full Admin group, and then one that's in the Read Only group. Confirm that the Full Admins have the ability to edit the configuration while Read Only can only view the config.
Troubleshooting:
If it's not working then you can enable a packet capture on the FGT to see what RADIUS packets are being sent from and received by the FGT.
Goto System > Network > Packet Capture and create a new capture with the filter criteria of port 1812 (RADIUS). Ensure the interface selected is that one that the FGT will be talking to the FAUTH on. Click on the play button when finished to start the capture.

Log out and try to log back in as one of the RADIUS users. If it fails then login with a local admin and go back to the packet capture. Stop the filter and download the pcap file.

Open the pcap from wireshark and view the return packet. We should be seeing the RADIUS attribtues that match the user group. If we're not seeing a attribute ID then the problem is somewhere on the FAUTH (check the RADIUS client and confirm the groups are selected. Also confirm the user groups have the radius attributes configured). If the attribtue IDs are correct then the problem is on the FGT ( double-check the group on the FGT and the admin user).

3. Configuring SSO to be used by the FGT
Now let's configure SSO.
1. Login to the FAUTH and goto Fortinet SSO Methods > SSO > General.
From here enter a secret, enable NTLM and add the user domain, then tick all the boxes highlighted below. You can add/remove options as required. Click OK and save:

2. There are a few ways of configuring FSSO, the way we'll be doing it is by polling the DCs. This has the benefit of not requiring any software to be installed on the DCs. To configure this goto Fortinet SSO Methods > SSO > Domain Controllers and add all the DCs that users will connect to.

3. Next we should create a filter so that only the groups we want to control with SSO will be sent to the FGT. This makes the config much cleaner on the FGT side. Goto Fortinet SSO Methods > SSO > FortiGate Filterign and edit the default filter.
Enable the 'Forward SSO' then click on 'Import':

Select the LDAP server and then tick the groups we want to control in FSSO. Click OK to save.

Confirm the groups are showing up correctly in the filter then click OK to save.

4. This should be all we need to do on the FAUTH. Now login to the FGT and goto User & Device > Authentication > Single Sign-On, create a new fsso server.
Add a name, the FAUTH IP address and the password we configured in step 1. Click Apply & Refresh and the FGT should pull the groups we selected in the filter from step 3. Click OK to save.

Confirm that the fsso server we created has a green tick in the status. This means it's able to talk to the FAUTH correctly. If it doesn't then confirm the password and IP addresses on the FGT and ensure that step 1 was configured correctly.
5. Now let's create the SSO groups. Note that these are different than the RADIUS groups we configured previously. The RADIUS groups were used for admin logins, the SSO groups are used to create firewall policies based on user/groups that have logged into the domain.
Goto User & Device > User > User Groups and create a new group. Enter a descriptive name, select FSSO and select the group this matches.

Do this for all the groups you want to track:

6. Now we need to add these groups to the firewall policies where we want to control based on group membership. Goto Policy & Objects > Policy > IPv4 and edit the policy from the internal network to the internet. Add the groups we created in step 5 as required. Click OK to save.

Your policy should look something like the following (seq# 3):

7. Lets test it out! Get one of your users to login to their computers that's connected to the domain. If they're already logged in they will need to log out first. Take a note of the username, group and IP address of their computer.
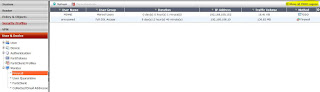
Log into the FAUTH and confirm that the user is showing up under Monitor > SSO > SSO Services.

Login to the FGT and confirm we can see the user as well. Goto User & Device > Monitor > Firewall then select 'Show all FSSO Logons" (highlighed below). We should see the same user here that's now being tracked by the user group we created in step 5.

Lastly goto Log & Report > Traffic Log > Forward Traffic and we should see traffic with the source as the user.
Troubleshooting
If the users are not showing up correctly then you can check the following to ensure each section good.
1. Monitor > SSO > Domains
Make sure you can see the domain and it's got a green tick

2. Monitor > SSO > SSO Sessions
Make sure you can see the user logged in here

3. Monitor > SSO > Domain Controllers
Make sure you can see the DCs here and that you have a green tick under 'Connected'
4. Monitor > SSO > FortiGates
Make sure you can see the FortiGate here
4. Creating a root certificate to be used by the FGT
Now it's time to configure the FAUTH as a certificate authority. We want to use it to sign certificates that the FGT will use for it's admin GUI and also used for the FGT with deep packet inspection.
1. Login to the FAUTH, goto Certificate Management > Certificate Authorities > Local CA's and create a new certificate authority.
Give it a name, select 'Root CA Certificate' and configure the key options as per below. Once finished click OK to save.

2. By default all the computers in our domain will not trust this certificate. So we need to now download it to be pushed out and installed on our computers as a trusted root CA. This can be done via AD group policy. I'll go through the steps to do it manually on a computer.
First select the root certificate and click 'Export'

3. Now that we have the public certificate we can install it on our computers. One thing to note here is that there are two certificate stores that we may need to install it in. Internet Explorer and Chrome use one store, and Firefox has it's own store. I'll go through the steps to install in both.
For IE/Chrome, right click on the certificate and select 'Install Certificate'.


Click Yes to confirm and install the certificate.

For Firefox, goto Options > Advanced > Certificates and click 'View Certificates'

Select 'Authorities' and click 'Import'

Select the root certificate and click OK. Now we should get the option of what to trust this certificate with. Select all options and click OK.

4. Now that the root certificate is trusted by our computer we can start with creating a certificate for our FGT admin GUI. Login to the FGT and goto System > Certificates. Click on 'Generate' to create a new certificate signing request.
Enter you firewalls IP address or hostname and click OK to save.

1. Login to the FAUTH, goto Certificate Management > Certificate Authorities > Local CA's and create a new certificate authority.
Give it a name, select 'Root CA Certificate' and configure the key options as per below. Once finished click OK to save.

2. By default all the computers in our domain will not trust this certificate. So we need to now download it to be pushed out and installed on our computers as a trusted root CA. This can be done via AD group policy. I'll go through the steps to do it manually on a computer.
First select the root certificate and click 'Export'

3. Now that we have the public certificate we can install it on our computers. One thing to note here is that there are two certificate stores that we may need to install it in. Internet Explorer and Chrome use one store, and Firefox has it's own store. I'll go through the steps to install in both.
For IE/Chrome, right click on the certificate and select 'Install Certificate'.

Click next and place the certificate in the 'Trusted Root Certificate Authorities' certificate store.

Click Yes to confirm and install the certificate.

For Firefox, goto Options > Advanced > Certificates and click 'View Certificates'

Select 'Authorities' and click 'Import'

Select the root certificate and click OK. Now we should get the option of what to trust this certificate with. Select all options and click OK.

4. Now that the root certificate is trusted by our computer we can start with creating a certificate for our FGT admin GUI. Login to the FGT and goto System > Certificates. Click on 'Generate' to create a new certificate signing request.
Enter you firewalls IP address or hostname and click OK to save.

5. We should now see this certificate with the status of 'Pending'. Select the certificate and click on 'Download'.

6. Save the file to your local drive. Log back into the FAUTH and goto Certificate Management > End Entities > Users and click 'Create New'
From here select 'CSR to sign' and browse to the certificate we created/downloaded in steps 4/5. Click OK to save.

7. Now we should see the certificate has been signed by the FAUTH and it's status is Active. We now select the certificate and export it to our drive.

8. Log back into the FGT and select Import > Local Certificate.

9. Select the certificate we downloaded in step 7 and click OK

We should now see the certificates status changed from 'Pending' to 'Ok'

Ok so lets recap what we just done now... we create a certificate request from the FGT. We then downloaded that certificate and imported it into the FAUTH. The FAUTH signed it with it's own certificate. We downloaded this signed certificate and imported it back into the FGT.
10. Now lets use this certificate for our admin GUI page. Goto System > Admin > Settings and select the certificate we created/signed previously. Click Apply to save.

11. Close your browser and reopen. Goto your FGT admin page and we should now see that the certificate has been signed and verified by the FAUTH. Because we imported this root certificate (in step 3) we shouldn't get an error anymore.

Last thing we want to do now is create a certificate that can be used by the FGT to sign web pages on behalf of their owners. This allows the FGT to break into SSL and perform a man in the middle 'attack' which will allow us to perform security functions like application control and AV within SSL traffic.
12. Create a certificate signing request just like we did in step 4:

13. Download the certificate and upload it into the FAUTH to be signed again. The only difference here is that we import the certificate as a CA. Goto Certificate Managment > Certificate Authorities > Local CAs and click on 'Import'
Select 'CSR to sign' and browse the certificate we created in step 12 (not the one from step 4). Click OK to save.

14. We can now see now see the certificate with the CA type of 'Intermediate (non-signing) CA'. Select the certificate and download it.

15. Import the downloaded certificate back into the FGT like we did in step 8 (ensuring we use the certificate downloaded in step 14).
We should now see the certificate with the status of 'OK'

16. Edit the certificate to confirm that CA=true

17. Now that we have our proxy certificate, lets select it in our deep inspection profile. Goto Policy & Objects > Policy > SSL/SSH Inspection, select the 'deep-inspection' profile (top right) or alternatively create your own one.
From here select the proxy certificate we imported under 'CA Certificate':

18. Next edit our internet policy and enable SSL/SSH Inspection and select the profile we edited/created in step 17.

19. Time to test it out! From our computer lets browse https://www.youtube.com. We can now see that it's been signed by the FGT and is not giving us an error.

20. View a youtube video then goto System > FortiView > Cloud Applications. From here we should now be able to see the video names the user is browsing. Note: to get this to work ensure the policy has application control enabled with cloud based inspection.

Phew, that's it from me for now. Hope you found this useful!
4 comments:
Brilliant article. I am struggling with configuring FortiManager as a radius client for admin logins. Configured as per document but when trying to login, the FortiAuth logs state that it receives an invalid credentials from LDAP. Packet capture also confirms this. Using the same credentials to log in to FortiAuthenticator with the LDAP account works so I know the credentials are ok. Any thoughts?
Thank you so much for explaining fortigate filtering groups.
I have to say, that your guide is SOOOO much better than anything Forti have made.
I have tried to run through the NSE6 training on FAC, but its not covered any of this!!!
I have manged to get most things sorted, but im not sure if i have hit limits.
Im a MSSP. I want my FAC in my DC and have clients polling back to FAC for FSSO and FTKM.
I will setup DC/TS to point back to fac for FSSO.
I will also need LDAPS (need to work this out still, as im not planning on a tunnel from each client to FAC) to allow it to all link up.
What i am struggling with is setting up my office AD account, to be admin on remote fortigate. If i setup FSSO on remote FG, it wont allow me to setup admin groups based on FSSO.
if i setup LDAP(s) it will only see local users on the FAC.
Is there a way to do the forward on LDAP users to remote LDAP server like you can with the LDAP/FSSO?
Fantástica Información.
Post a Comment