FortiGates allow you to configure upto six custom DHCP options beyond the standard default gateway, DNS, NTP and domain options.
We'll go through the steps to configure a DHCP server from scratch and configure the most commonly used options as well as a few custom ones.
The details for this DHCP server will be as follows:
Interface: wifi-interface
Address Range: 192.168.2.100-192.168.2.254
Subnet: 255.255.255.0
Default Gateway: 192.168.2.99
Primary DNS: 192.168.2.99
Secondary DNS: 8.8.8.8
Primary NTP: 192.168.2.99
Domain name suffix: labdomain.local
Option 252: http://myproxy.com:80/wpad.dat (this is the default proxy option)
Option 66: 192.168.2.111 (TFTP option to allow provisioning to unmanaged SIP phones)
Firstly goto the CLI and enter the following to create a new DHCP server.
FORTIGATE80C # config system dhcp server
FORTIGATE80C (server) # edit 0
Now type the following to create the IP range
FORTIGATE80C (3) # config ip-range
Next the following set commands for all the basic options:
FORTIGATE80C (3) # set default-gateway 192.168.2.99
FORTIGATE80C (3) # set netmask 255.255.255.0
FORTIGATE80C (3) # set dns-server1 192.168.2.99
FORTIGATE80C (3) # set dns-server2 8.8.8.8
FORTIGATE80C (3) # set ntp-server1 192.168.2.99
FORTIGATE80C (3) # set domain labdomain.local
FORTIGATE80C (3) # set interface wifi-interface
Now for the custom options. The syntax for custom options on a FortiGate is:
set <option number> <option>
The option number is a decimal number (in this instance 252 and 66), while the option itself is the value we want (http://myproxy.com:80/wpad.dat and 192.168.2.111). The thing to note is that the FortiGates require the option to be in hexadecimal, not as a string or digits. So before we can begin, we need to convert the strings into hexadecimal first.
A quick google for 'string to hexadecimal converter' will bring up some useful pages. I like to use the one at string-functions.com. Type in the strings you want to convert and save the hexadecimal output.


We'll go through the steps to configure a DHCP server from scratch and configure the most commonly used options as well as a few custom ones.
The details for this DHCP server will be as follows:
Interface: wifi-interface
Address Range: 192.168.2.100-192.168.2.254
Subnet: 255.255.255.0
Default Gateway: 192.168.2.99
Primary DNS: 192.168.2.99
Secondary DNS: 8.8.8.8
Primary NTP: 192.168.2.99
Domain name suffix: labdomain.local
Option 252: http://myproxy.com:80/wpad.dat (this is the default proxy option)
Option 66: 192.168.2.111 (TFTP option to allow provisioning to unmanaged SIP phones)
Firstly goto the CLI and enter the following to create a new DHCP server.
FORTIGATE80C # config system dhcp server
FORTIGATE80C (server) # edit 0
Now type the following to create the IP range
FORTIGATE80C (3) # config ip-range
FORTIGATE80C (ip-range) # edit 1
FORTIGATE80C (1) # set start-ip 192.168.2.100
FORTIGATE80C (1) # set end-ip 192.168.2.254
FORTIGATE80C (1) # end
FORTIGATE80C (3) # set default-gateway 192.168.2.99
FORTIGATE80C (3) # set netmask 255.255.255.0
FORTIGATE80C (3) # set dns-server1 192.168.2.99
FORTIGATE80C (3) # set dns-server2 8.8.8.8
FORTIGATE80C (3) # set ntp-server1 192.168.2.99
FORTIGATE80C (3) # set domain labdomain.local
FORTIGATE80C (3) # set interface wifi-interface
Now for the custom options. The syntax for custom options on a FortiGate is:
set <option number> <option>
The option number is a decimal number (in this instance 252 and 66), while the option itself is the value we want (http://myproxy.com:80/wpad.dat and 192.168.2.111). The thing to note is that the FortiGates require the option to be in hexadecimal, not as a string or digits. So before we can begin, we need to convert the strings into hexadecimal first.
A quick google for 'string to hexadecimal converter' will bring up some useful pages. I like to use the one at string-functions.com. Type in the strings you want to convert and save the hexadecimal output.

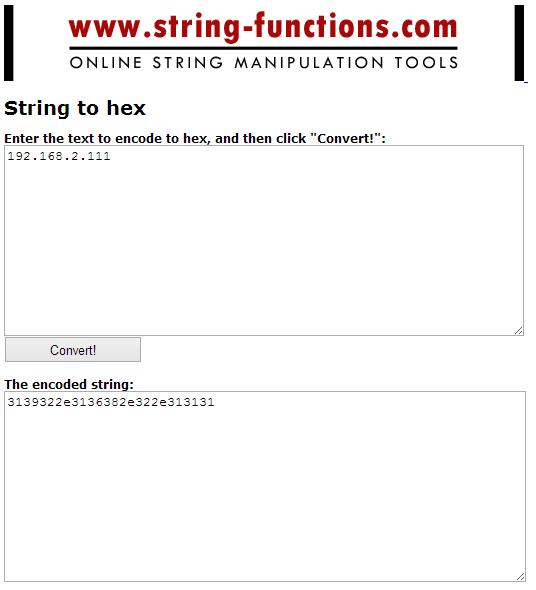
Now that we've got the two hexadecimal values we can configure the DHCP custom options as follows:
FORTIGATE80C (3) # set option1 252 687474703a2f2f6d7970726f78792e636f6d3a2f777061642e646174
FORTIGATE80C (3) # set option2 66 3139322e3136382e322e313131
Give a quick 'show' command to display and confirm all your settings are correct:
FORTIGATE80C (3) # show
config system dhcp server
edit 3
set default-gateway 192.168.2.99
set domain "labdomain.local"
set interface "wifi-interface"
config ip-range
edit 1
set end-ip 192.168.2.254
set start-ip 192.168.2.100
next
end
set netmask 255.255.255.0
set option1 252 '687474703a2f2f6d7970726f78792e636f6d3a2f777061642e646174'
set option2 66 '3139322e3136382e322e313131'
set dns-server1 192.168.2.99
set dns-server2 8.8.8.8
set ntp-server1 192.168.2.99
next
end
To save your config and exit, use the 'end' command:
FORTIGATE80C (3) # end
FORTIGATE80C #
Now we get to test it out! The easiest way I test out DHCP changes is via Wireshark. Run a wireshark filter on the interface you're going to connect to the FortiGate (in this instance my wireless card) and apply the following filter to only display the DHCP packets: bootp.option.type == 53
Release your IP address and renew it; you should now see the DHCP packets populating Wireshark.
Expand the third packet highlighted (DHCP Offer) and you should see the custom options come up!

7 comments:
Very helpful, thank you! The only information I could find from FortiNet was an outdated guide that instructed me to use the DHCP menu, which no longer exists.
Even their own employees joke about how things move around and disappear all the time, and this is a good example of one.
Having the instructions above though, configuring option 66 was really simple, so much appreciated.
thanks this was super helpful!
Very good example. You Might show the same example but doing it in the menu of fortigate and not through the console (CLI) mode? I forti use os 4 and want to move to the current v5, for me?
I don't think this opion 66 config would work. Any field that contains an IP address in Bootp vendor options(DHCP options) requires binary data, just like source/destination address field in Ethernet Frame header, not "ascii coded dotted-decimal-notation". So you need to convert each byte to HEX, like 192=C0, 168=A8,... so the correct config should be:
set option2 66 'C0A8026F'.
how to set lease time on fortigate 90D?
Thanks for pointing this out. It's not very helpful to read instructional articles that tell you how to do configure things incorrectly.
Option code 51. If you have FortiOS 5.6.2 it's listed under the interface -> DHCP Server -> Advanced -> Additional DHCP options section.
Post a Comment